Access to Personal Account
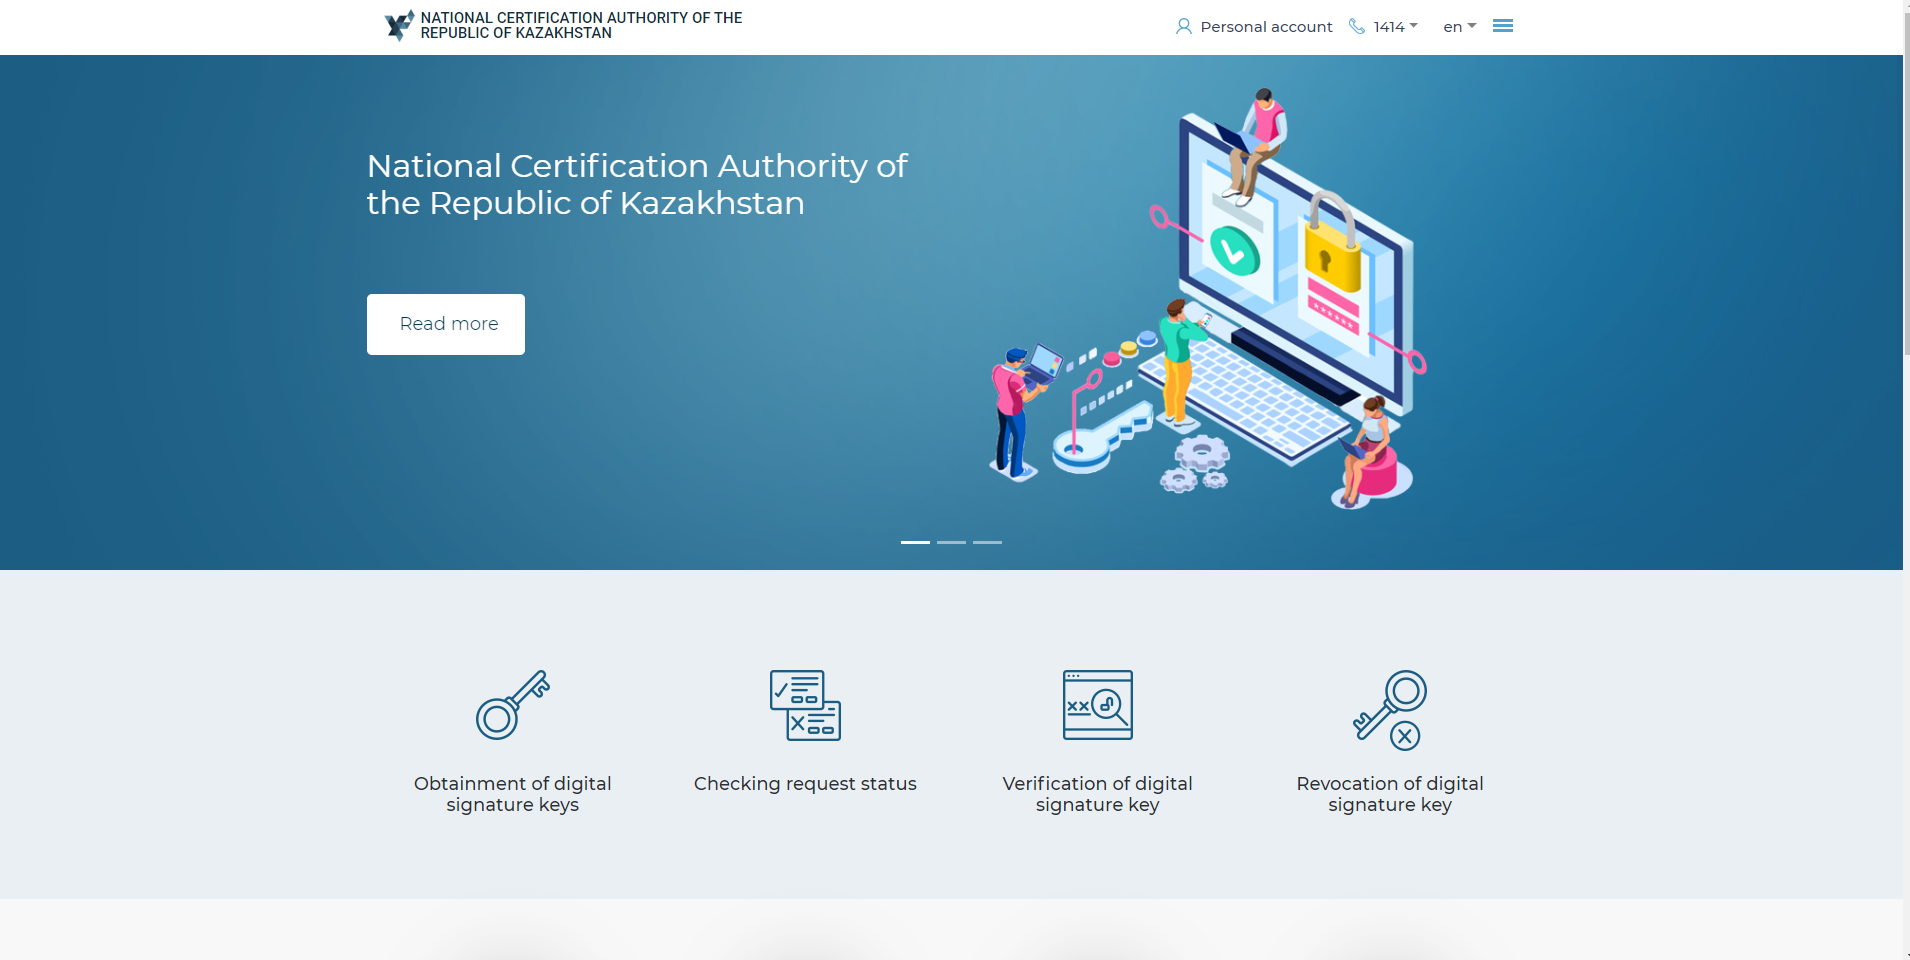
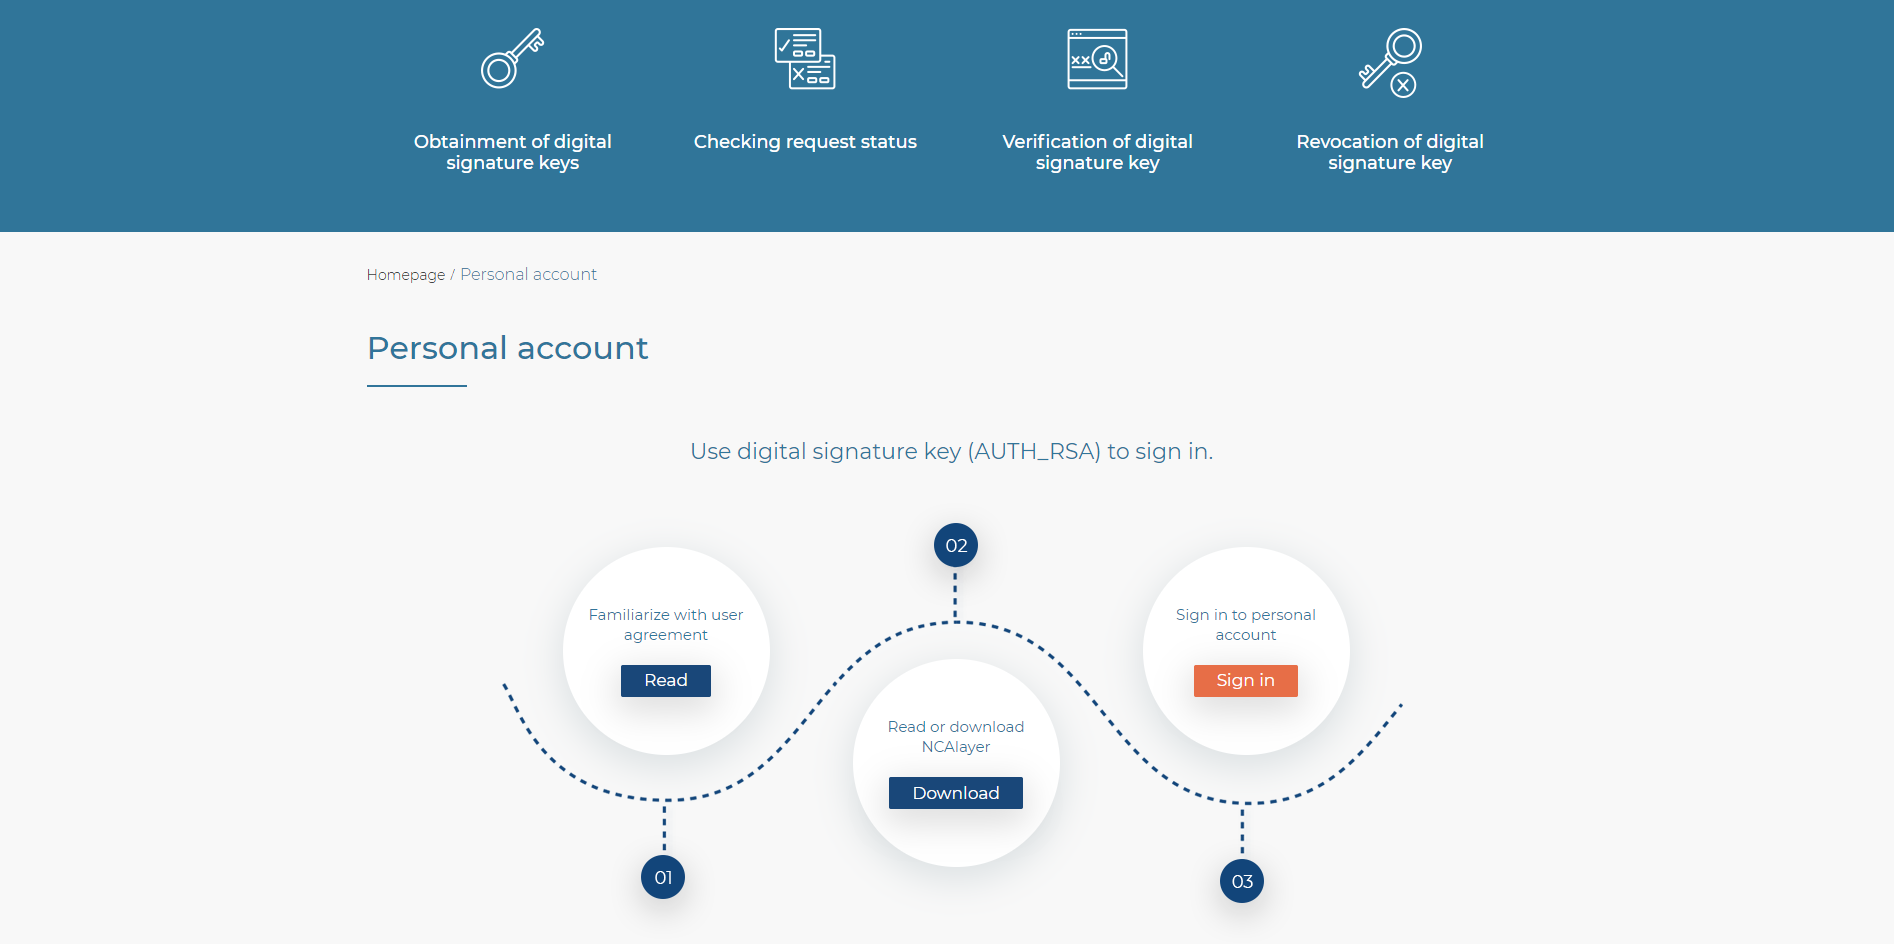
On the homepage at NCA website, you need to go to “Personal Account” section, then sign in to the Personal Account.
Sign in to your Personal Account.
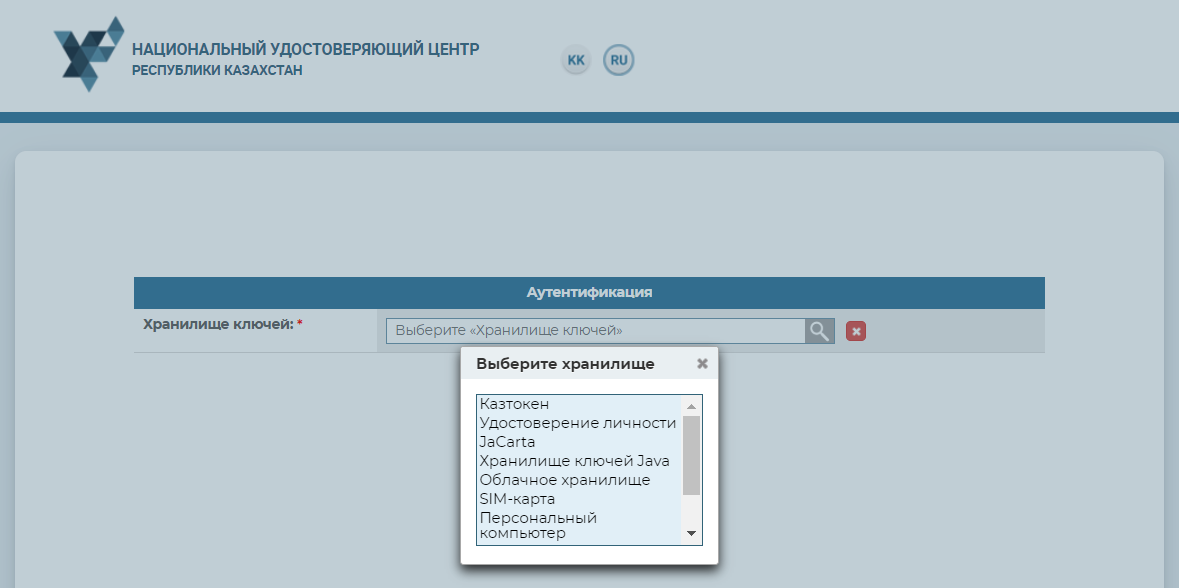
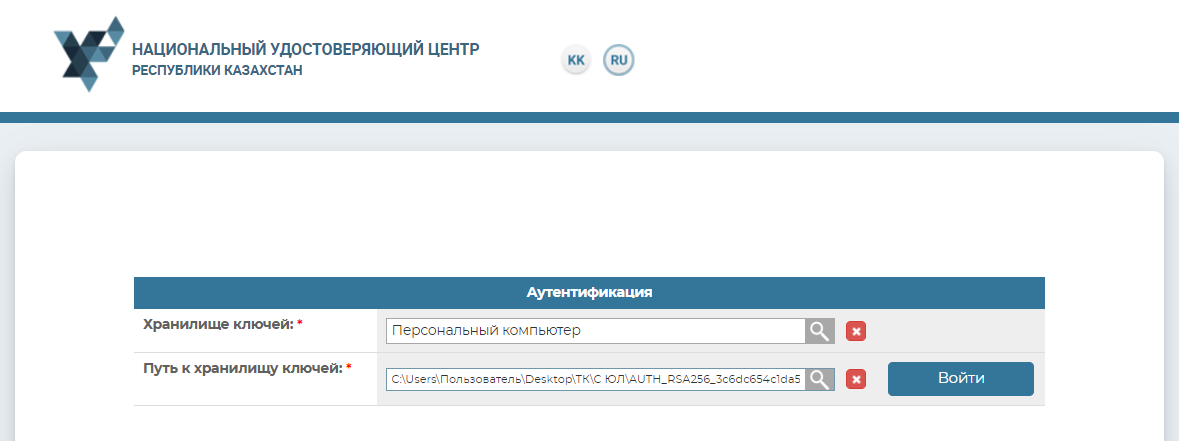
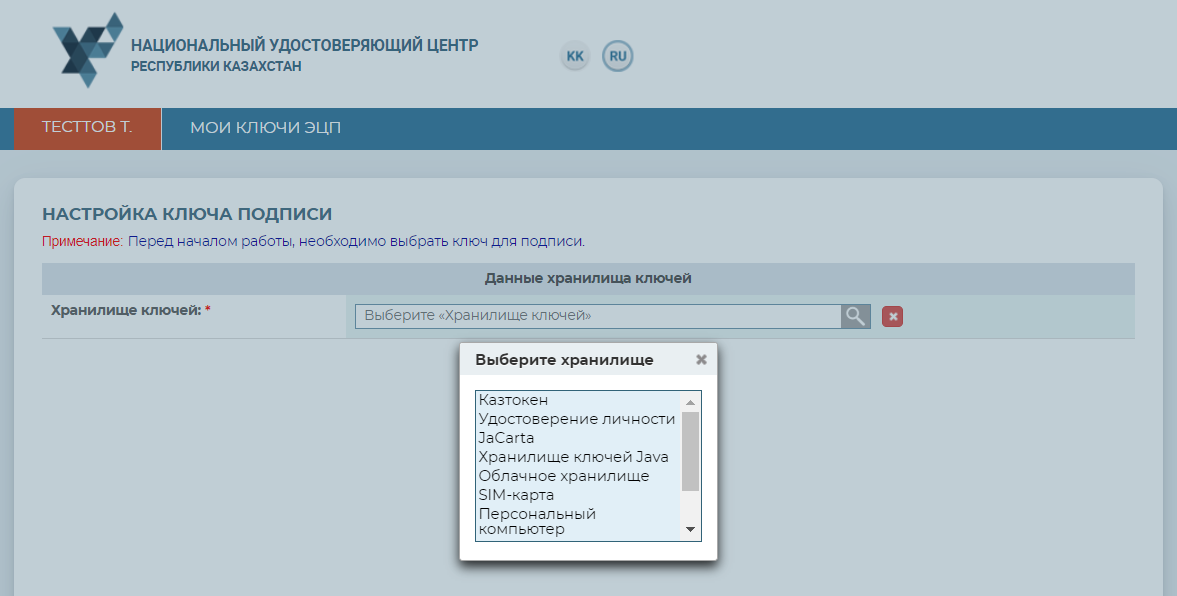
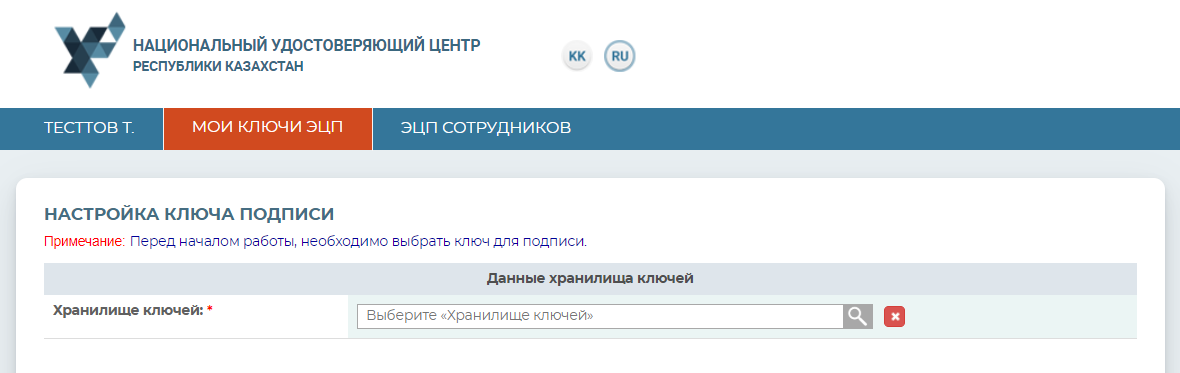
In the window opened, you should select the “Keys Repository” from the list containing: Personal Computer, eTokenPRO (Java, 72K), JaCarta, Kaztoken, AKey.
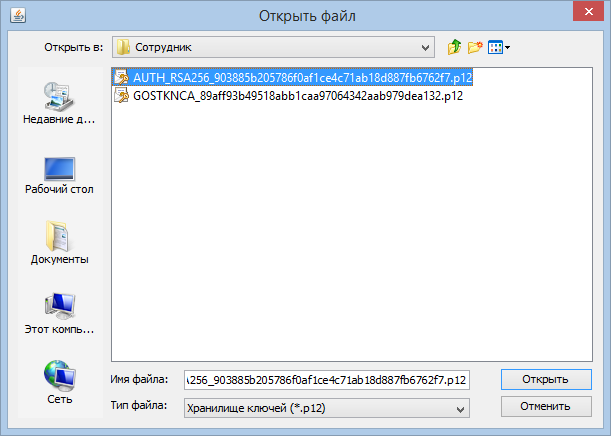
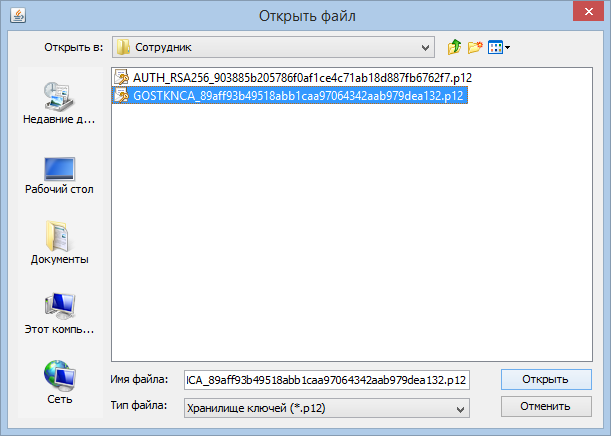
In the “Path to keys repository” field, you need to indicate the path to where your certificates are contained. Select the authentication key (AUTH_RSA) and press the “Open” button.
Press the “Enter” button.
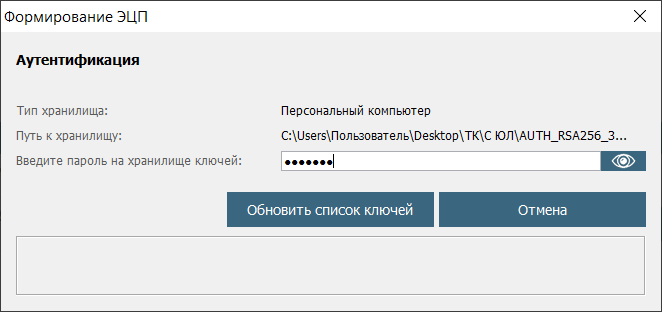
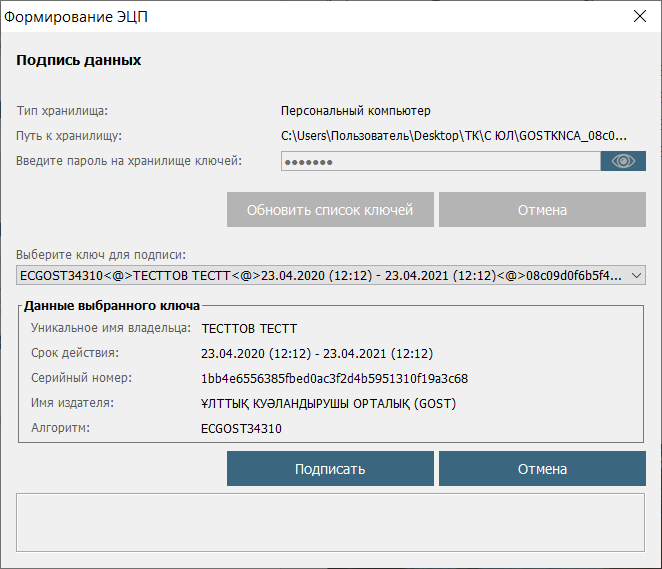
In the emerging dialogue window, enter Your password for keys repository.. NB: The default password for Kaztoken: 12345678, eToken PRO (Java, 72K), JaCarta, AKey: 1234567890.
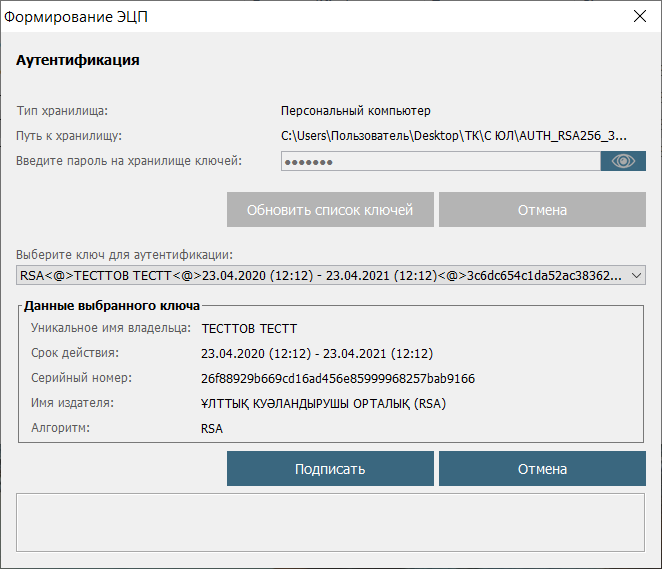
Press the “Update the list of keys” button. If the password is correct, then the authentication key will be displayed. Press the “Sign” button.
Entering the staff’s Personal Account has been performed.
Working in Personal Account
“Family Name” Menu
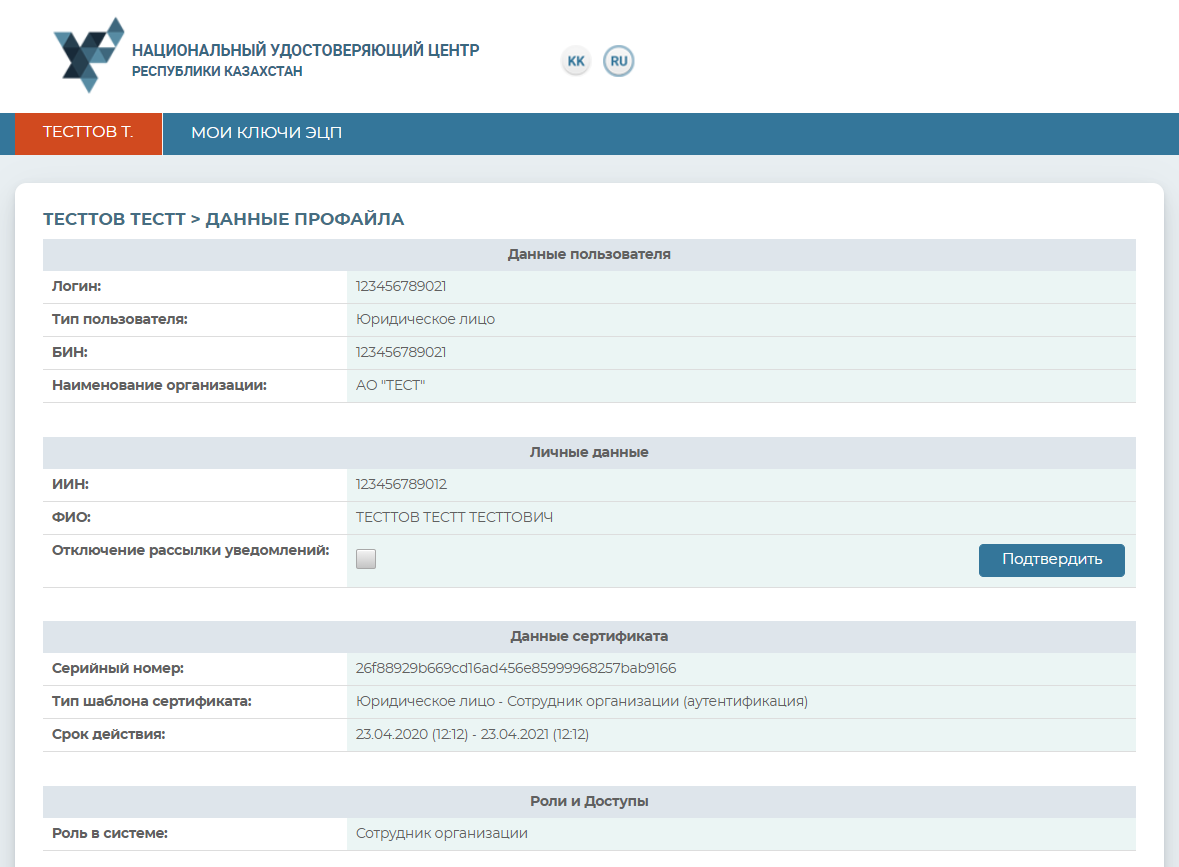
User’s “Family Name” menu contains information on NCA user profile.
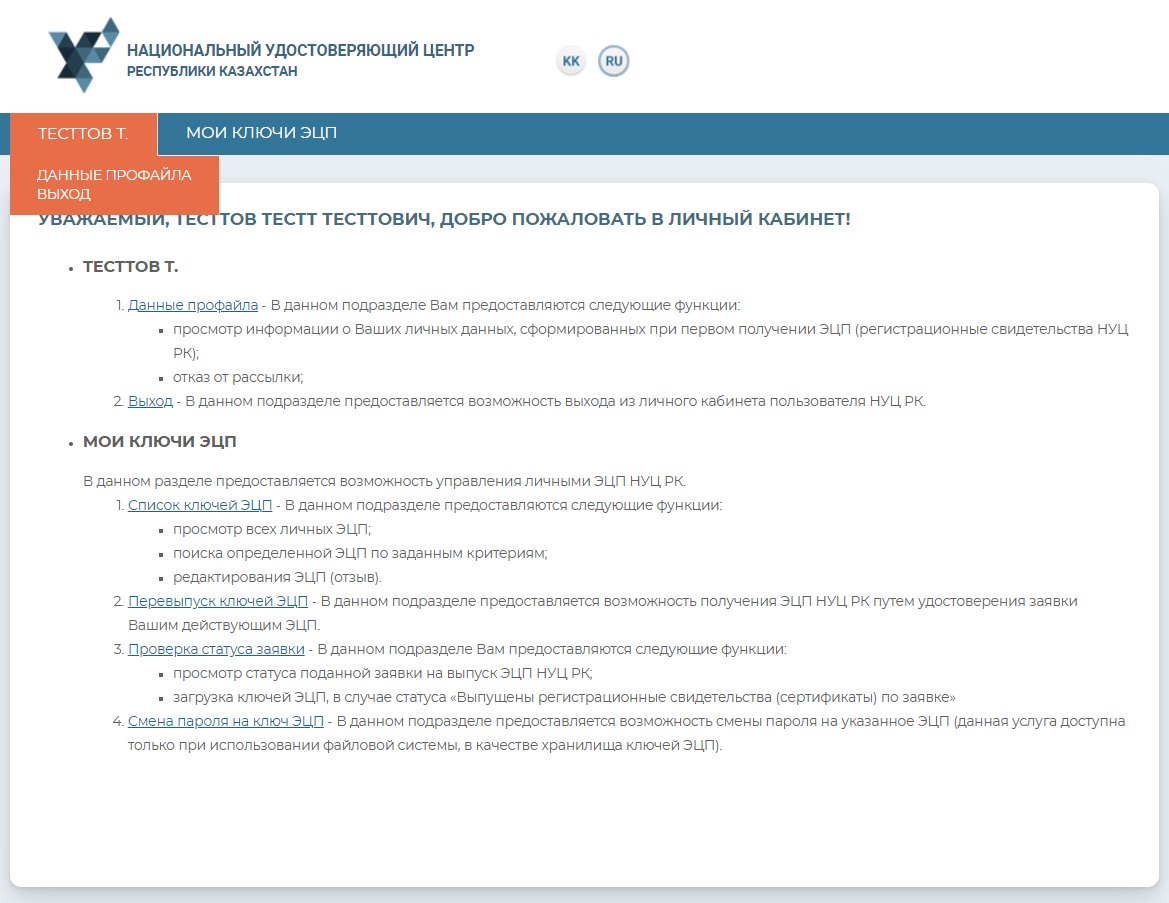
The profile data contains user’s personal information. In the settings, you may select the interface language, as well as cancel the receipt of notifications to your email.
“My Digital Signature Keys” Menu
To work with digital signature keys, go to the “My digital signature keys” tab.
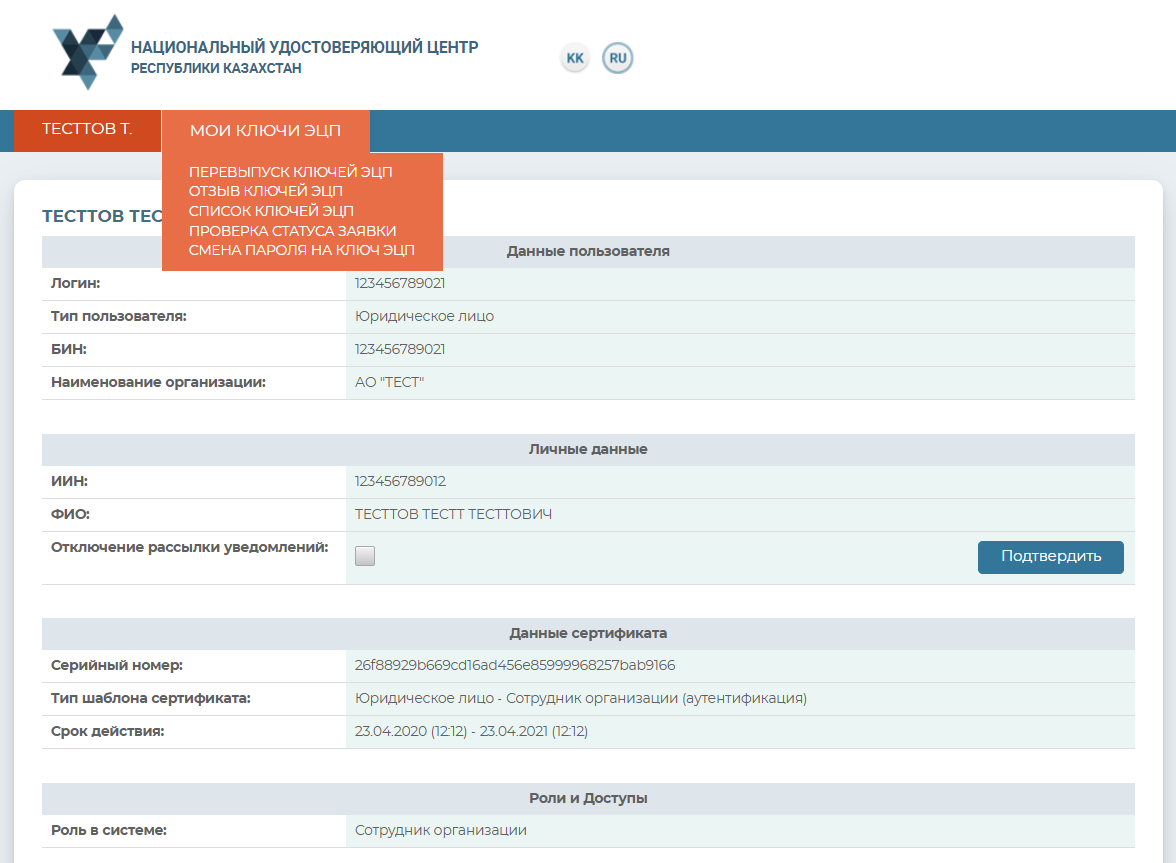
In the drop-down menu, select one of the below subsections:
• Digital signature keys renewal – provides capability of submitting an application online (subject to availability of effective keys), with no need to validate the application in Registration Authority; • Digital signature keys revocation – provides capability of revoking the certificates; • List of digital signature keys – displays the existing certificates; • Checking the application status – provides capability of checking the status of the application submitted and of setting the certificates; • Change of digital signature key password – provides capability of changing the password for digital signature keys.
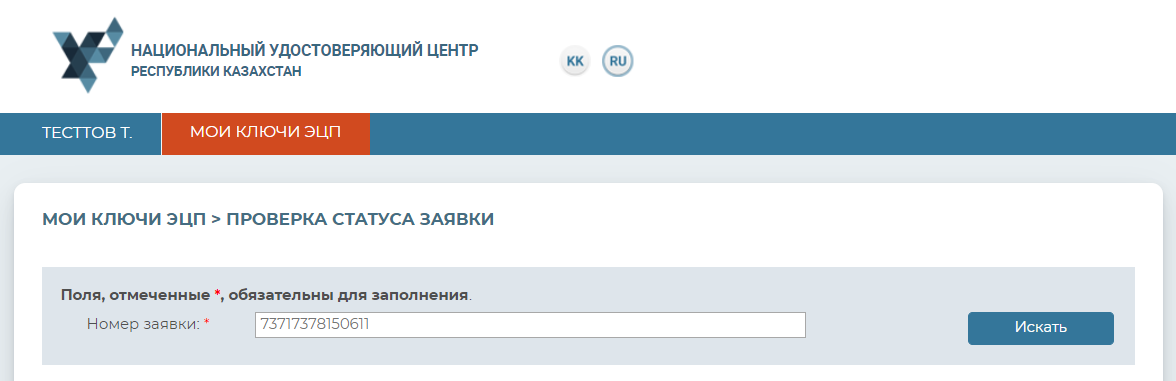
Checking the Application Status
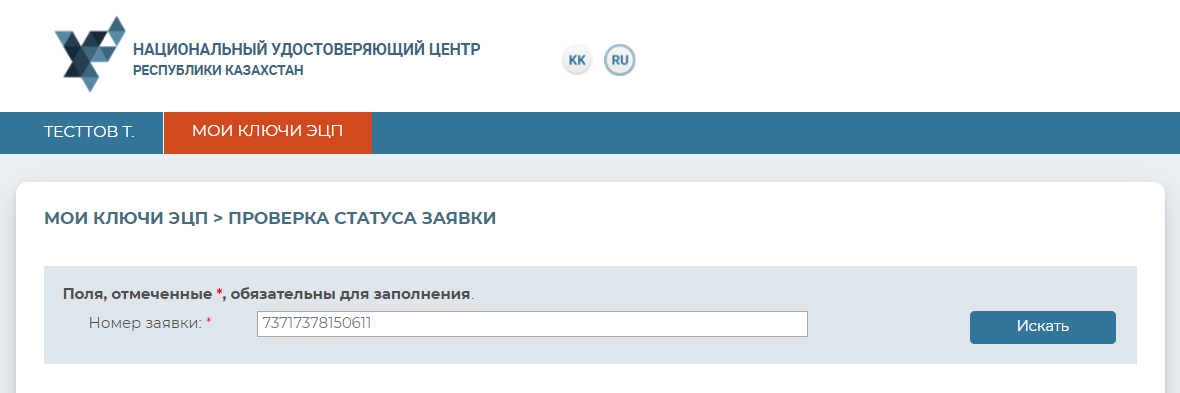
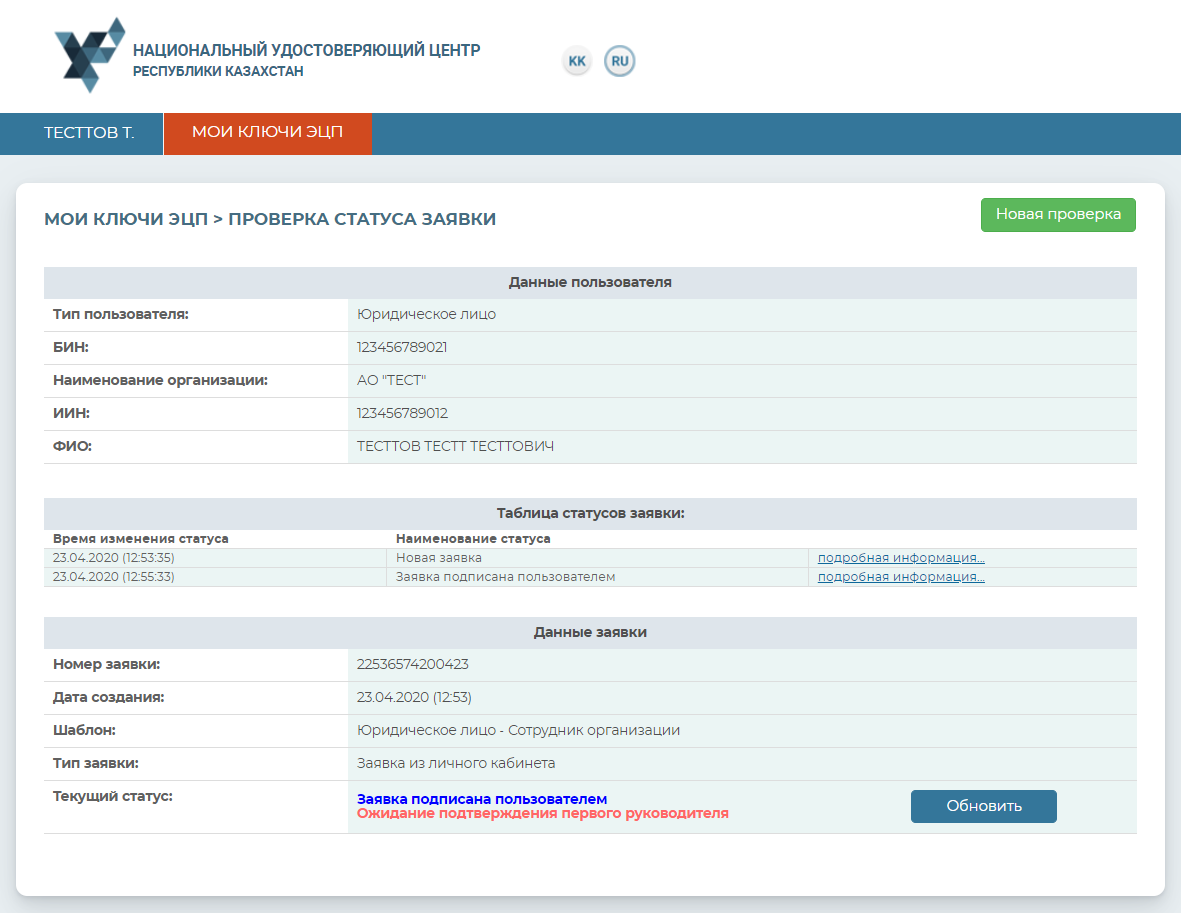
To check the application status, go to “My Digital Signature Keys” tab – “Check Application Status” section. In “Application Number” field, fill in the obtained unique number and press “Search” icon.
To set up the certificates, specify the folder where your private keys were stored and click the search icon. Indicate the storage place of your private keys generated at the time you submitted the application and press the “Open” button.
NB! In the event that in setting up the certificates, the keys were generated to one of the supported secure media: eToken 72K, JaCarta, Kaztoken, AKey, you should preliminarily connect the device to the PC.
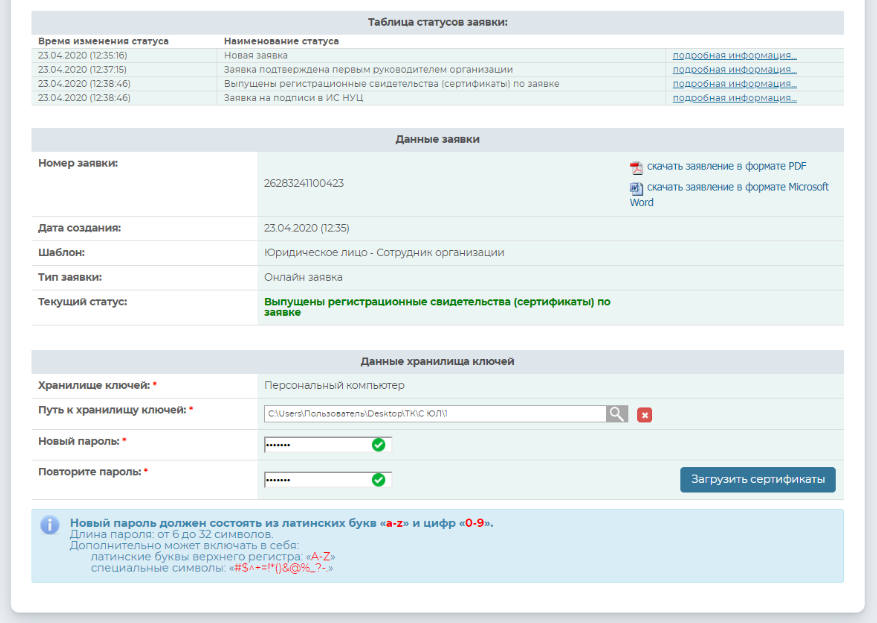
If you use the PC as keys repository, the fields for filing in the password will appear. Invent and enter your password for digital signature keys.
NB!! Password must contain Latin characters and digits. The password length should be 6 to 32 characters. In addition, password may include: Latin upper-case letters and wildcard characters «#$^+=!*()@%&_?-.».
You MUST remember the password you indicated! The password shall NOT be recovered! NCA shall not keep your password, and if you lose your password, these digital signature keys must be revoked.
Press the “Upload certificates” button.
Press the “Upload certificates” button.
The window will appear informing of the successful setting of the certificates.
Certificates have been set up.
Digital Signature Keys Renewal
In this section, you may submit your application online (subject to availability of effective digital signature keys), with no need to validate the application in Registration Authority.
Important! To activate this application, the top executive’s consent is required.
The main fields will be filled in automatically, in line with the already existing certificate. Indicate the email (as necessary), the locality, the keys repository and the Path to repository.
Press the “Submit application” button.
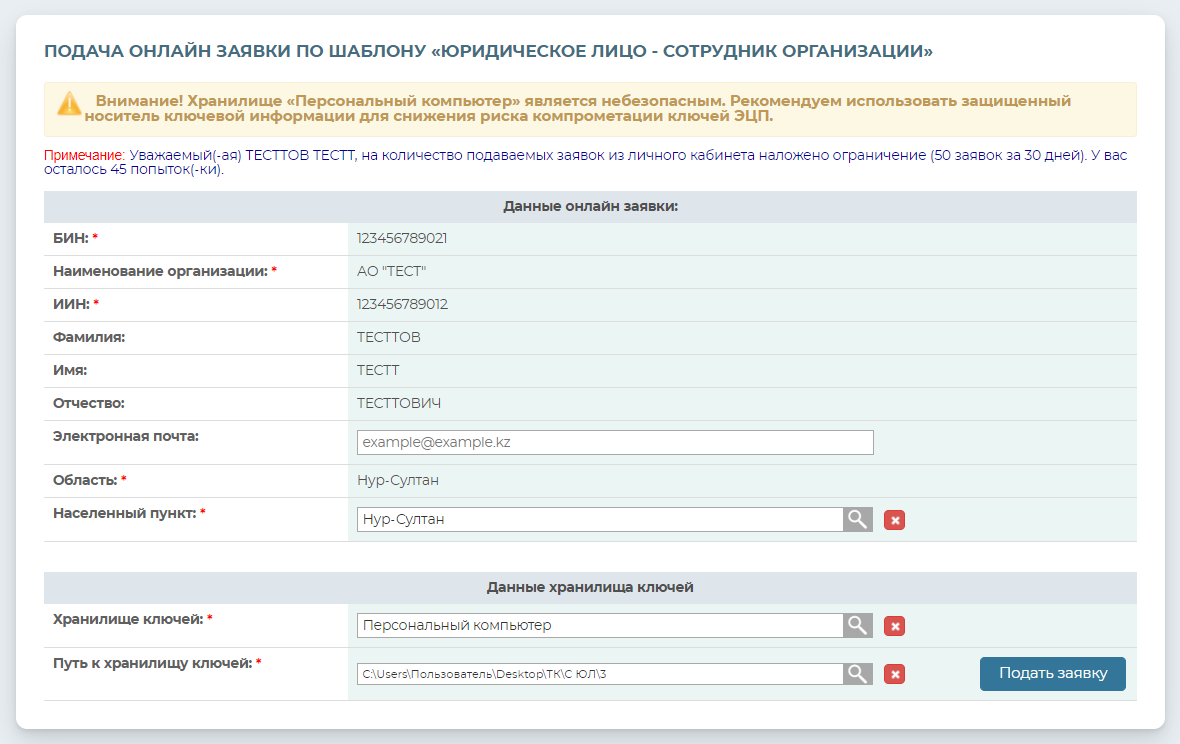
NB! The “Personal Computer” repository is insecure. We recommend using the secure key information media to reduce the risk of compromising the digital signature keys.
Tick the box for confirmation of correctness of the application under submission and press the “Confirm” button.
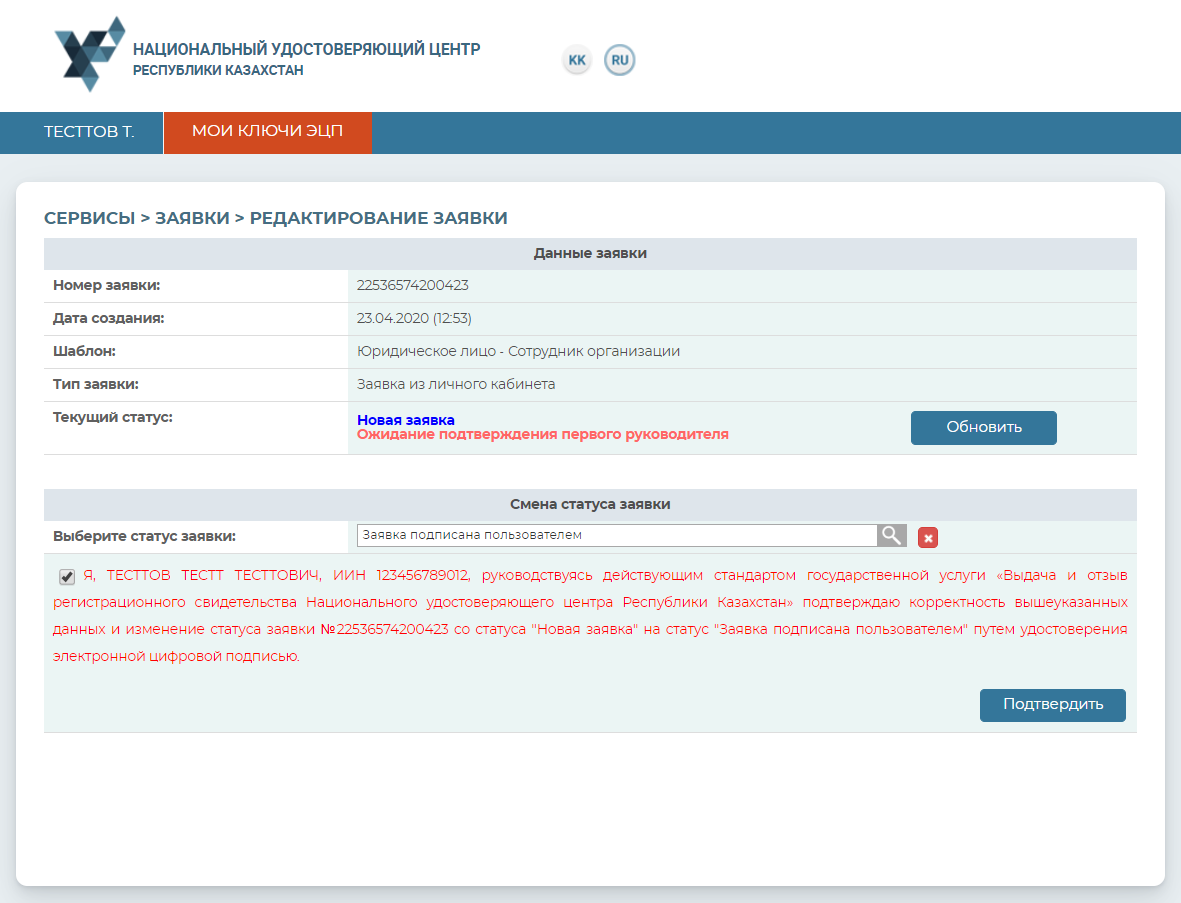
Enter the password and press the “Sign” button.
Remember the application number. Upon the approval of the application by top executive, install the certificates as per the “Checking the application status”.
Digital Signature Keys Revocation
To revoke the certificate, select from the list the required certificate and press the “Edit” button.
NB! For revocation of certificates, you need to have the valid signature key (GOSTKNCA). Therefore, to revoke certificates, we recommend revoking first the authentication key (AUTH_RSA), and then the signature key (GOSTKNCA).
Specify the keys repository.
You need to select the key for signature (GOSTNCA).
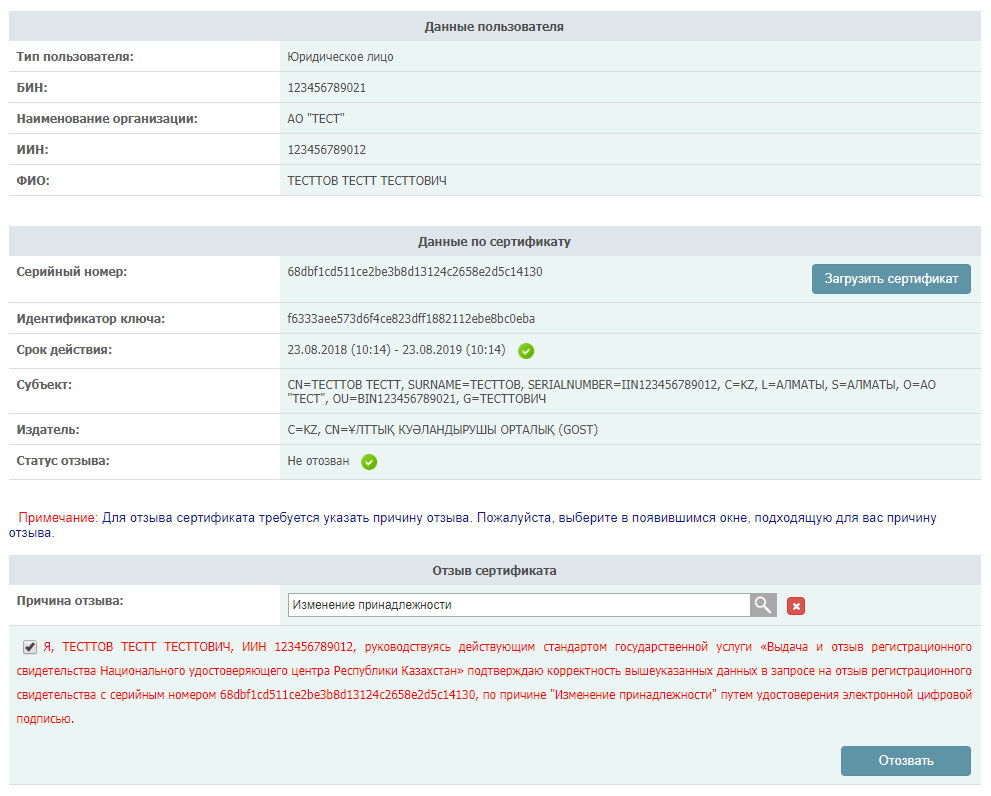
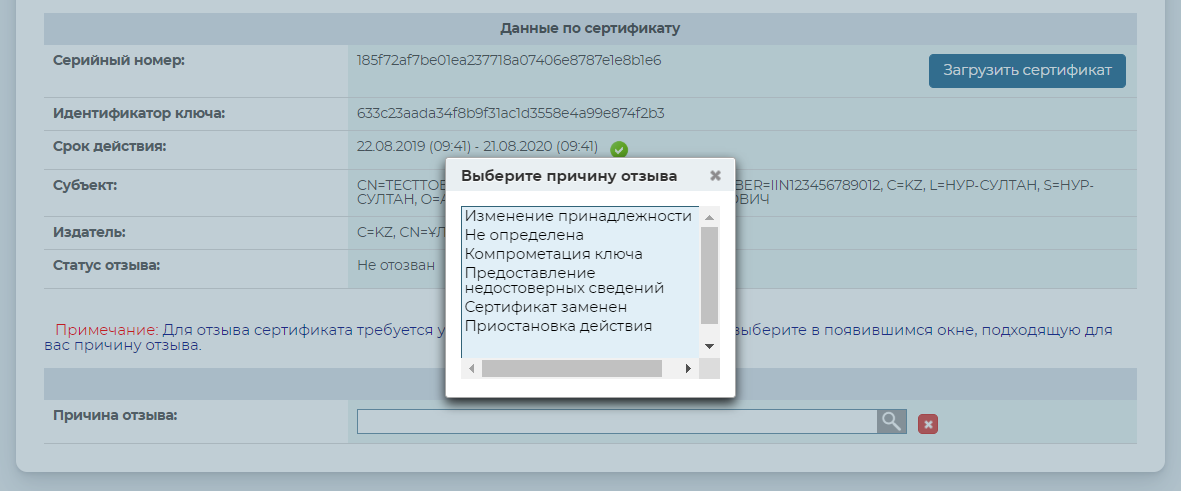
To revoke the certificate, the reason for revocation should be indicated. Please select in the emerging window the reason for revo9cation suitable to you.

Tick the box stating your consent to the actions being taken and press the “Revoke” button.
Sign with the digital signature keys (GOSTNCA).
The certificate revocation procedure is completed.
List of Digital Signature Keys
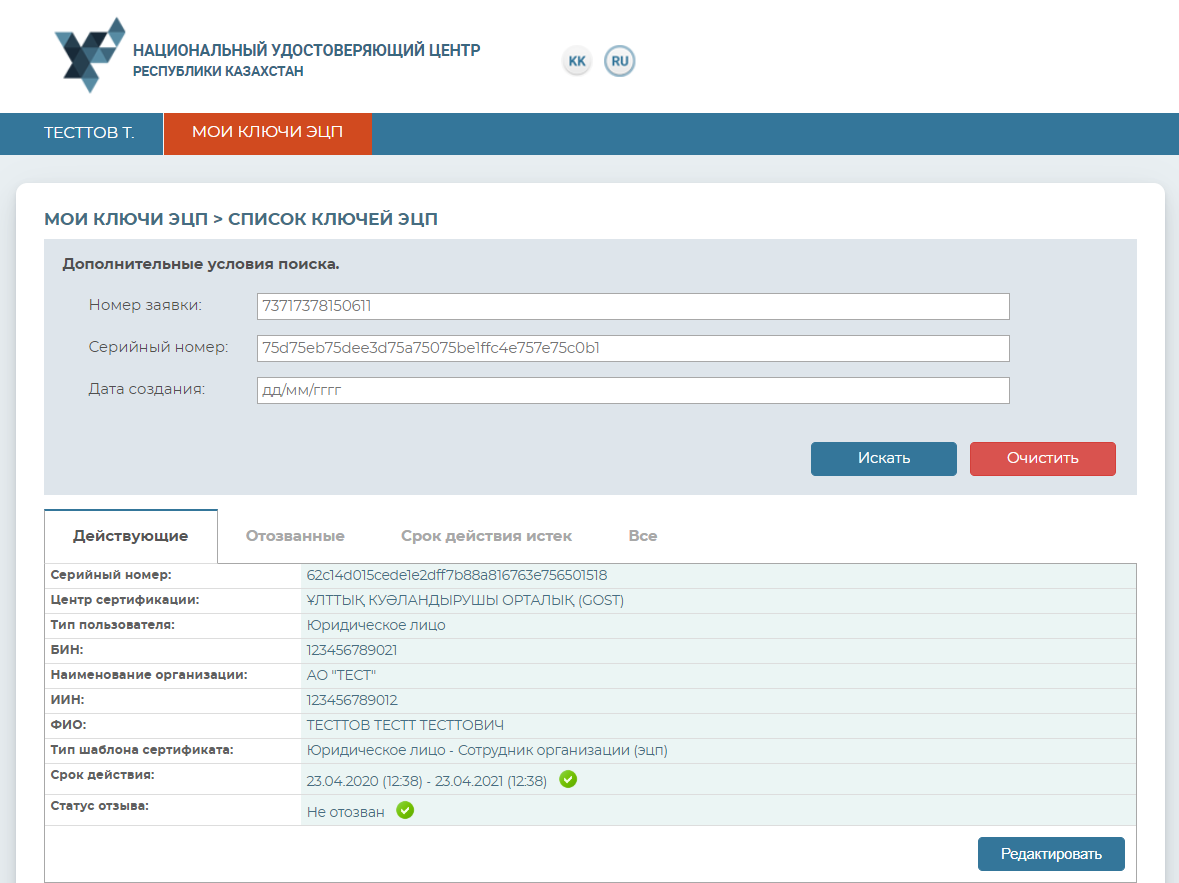
In the drop-down menu, select the “List of digital signature keys” section.
In the "List of digital signature keys” section, the list of all certificates is displayed with their current status indicated. There is also the function of separate display of list of digital signature keys by the following statuses: effective, revoked, and expired ones.
Change of Digital Signature Keys Password
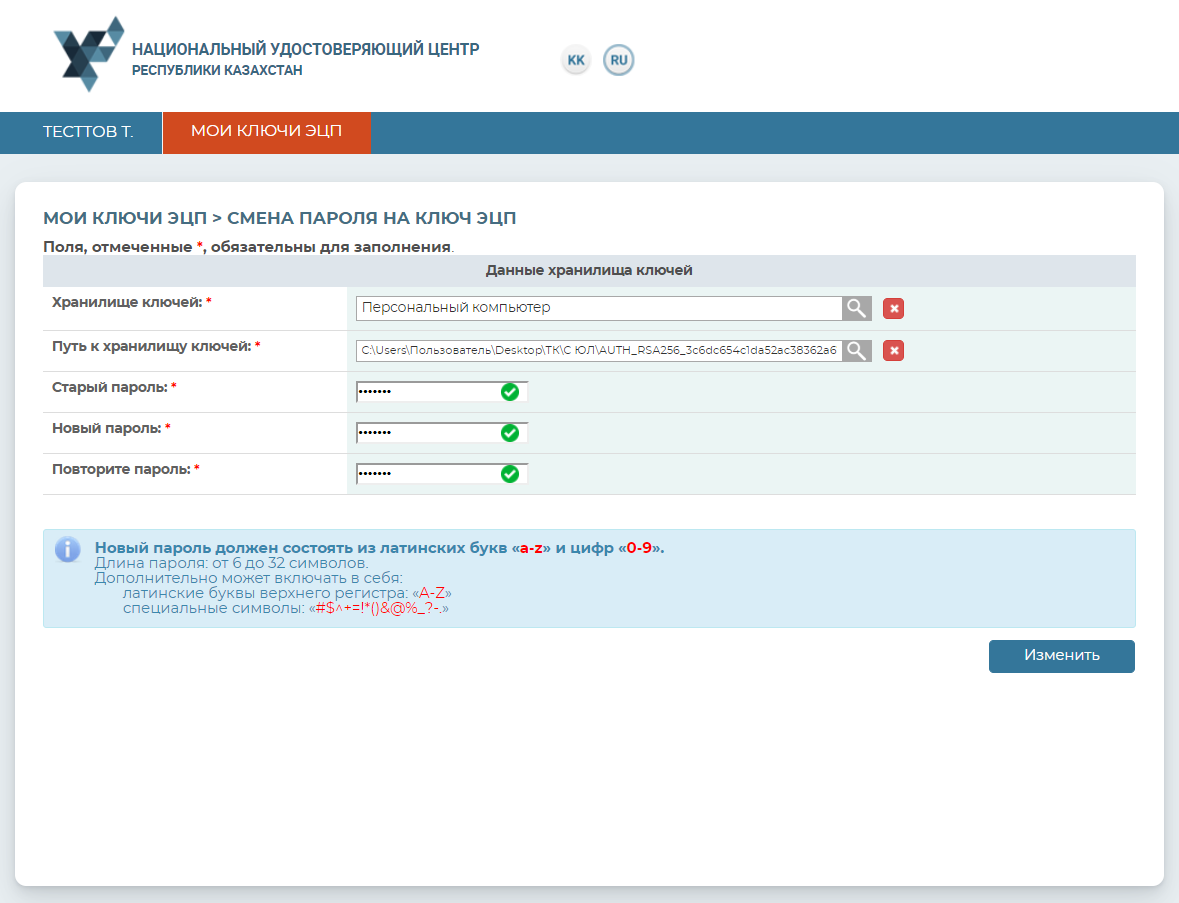
To change your digital signature keys password, you need to go to “My digital signature keys” menu item, and then to the “Change of digital signature key password” section. In the window that opens, indicate the location of your keys in the “Keys Repository” field.
Important!In the “Keys Repository” field, if you indicate the secure media then the password shall be set up directly to the secure media. In the event that you indicate your PC in the “Keys Repository” field, then the password will be set up directly to the digital signature keys.
Specify the “Path to keys repository”. Fill in the field for password entering and press the “Change” button. If you select the “Personal Computer” repository, then indicate digital signature key for the password to be changed. The password change procedure must be performed separately for each key.
NB! In the event that you have changed your password, yet by circumstance forgot it, you should undergo the keys receiving procedure once again, because NCA does not keep the passwords.
The password has been successfully changed.
Personal Account of a Staff with Signing Authority and of an HR Department Staff
A staff with signing authority and an HR department staff differ from other staffs in a legal entity by their Personal Accounts’ having an additional section named “Staffs’ Digital Signatures”.
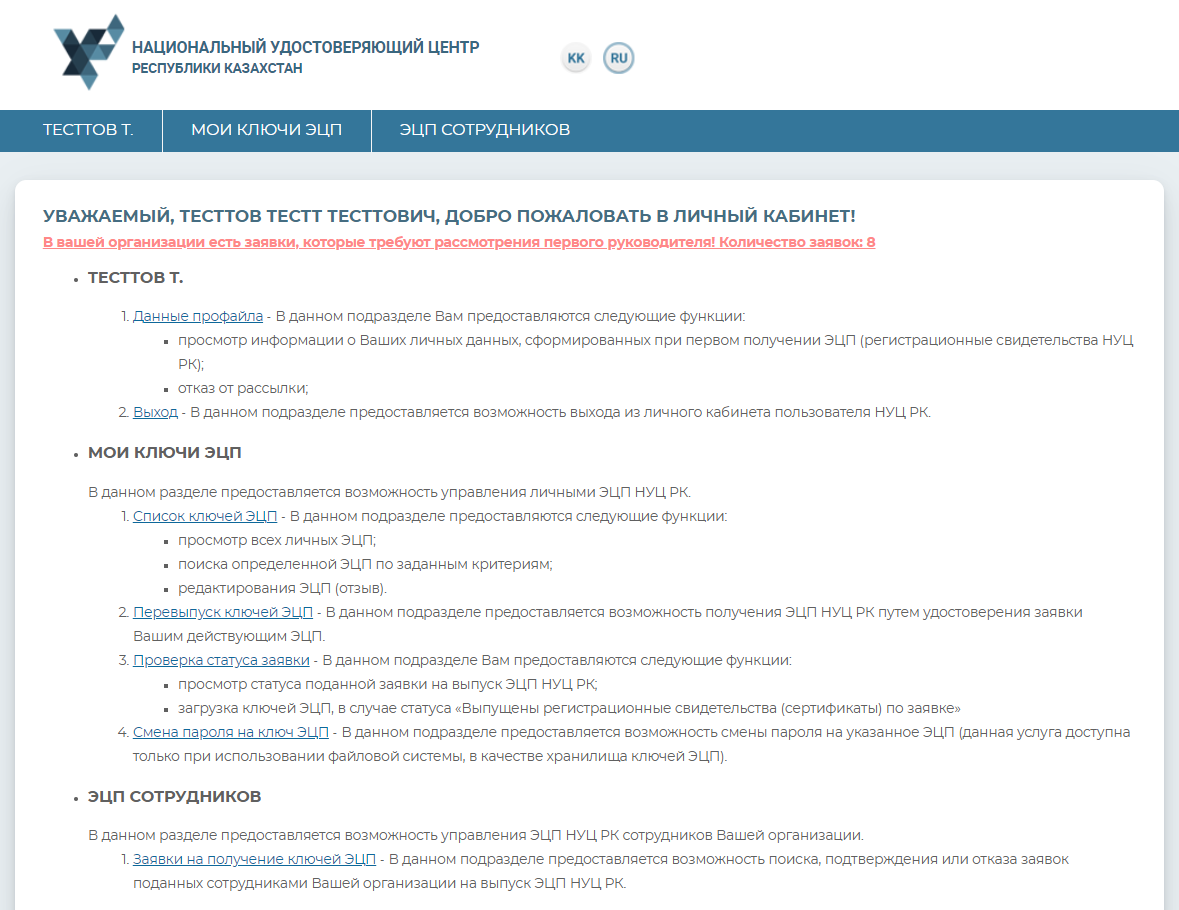
In the Staffs’ Digital Signatures” section, there are two subsections to be chosen: “Applications for digital signature keys” and “List of digital signature keys”.
Applications for digital signature keys
In the “Applications for digital signature keys” subsection, the information is provided relating to the submitted applications from your company for NCA certificates.
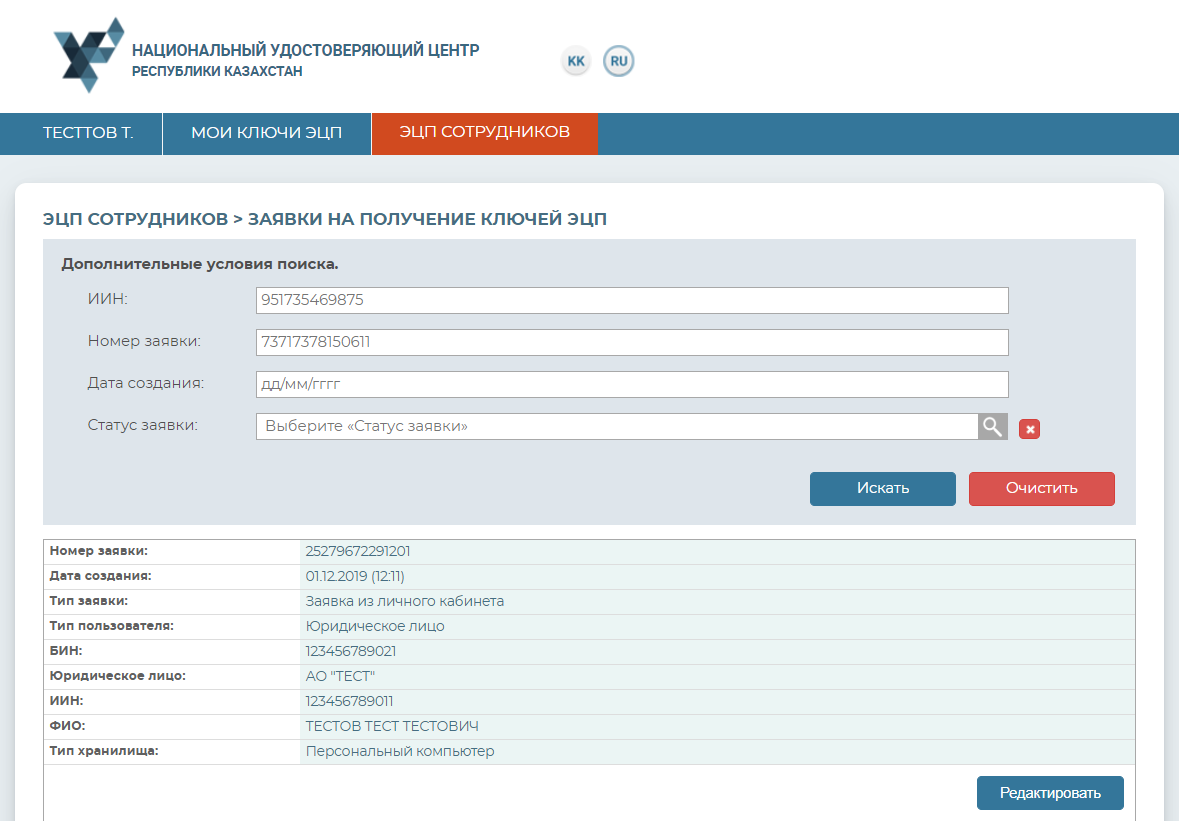
In the event that the top executive has assigned a signing-authority staff/HR department staff the right to confirm the applications, the capability of either confirming or rejecting the applications submitted on behalf of the company.
After searching for a certain application and selecting the “Edit” item in the “Keys Repository” field, you should specify the repository for certificates, and in the “Path to keys repository” field you need to indicate the location of the certificate to be signed, and then enter the password.
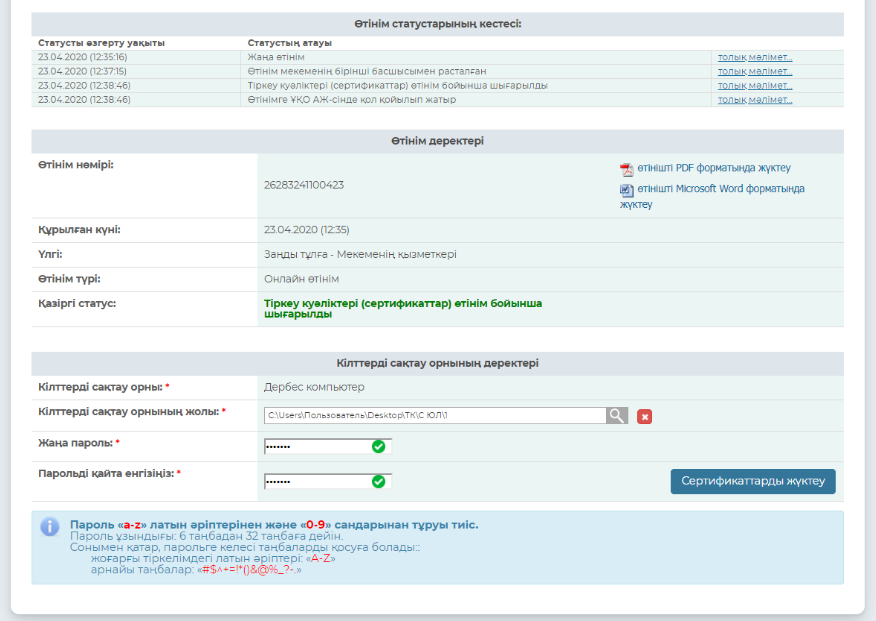
In the emerging window, the information on the submitted application will be displayed.
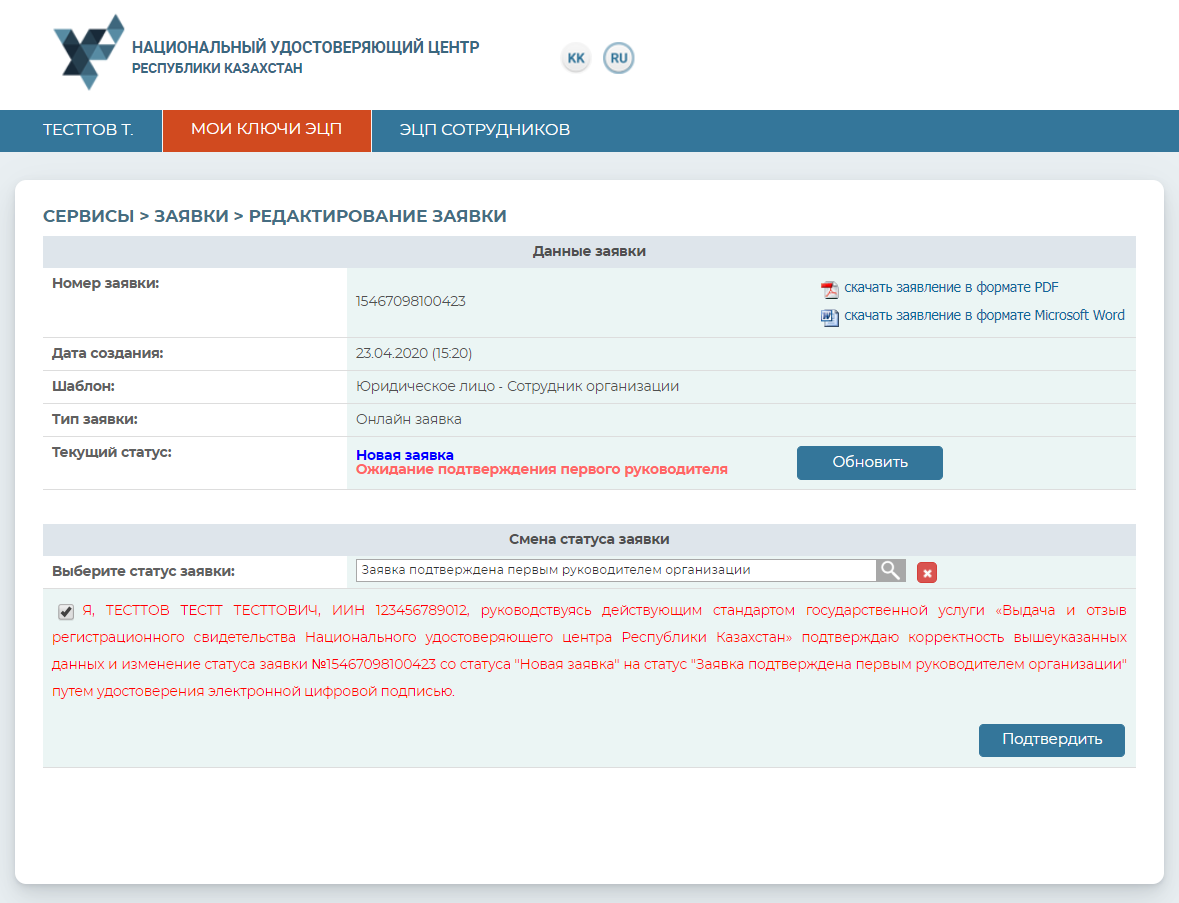
To change this application’s status, you need to select the status in the “Select the application status” item.
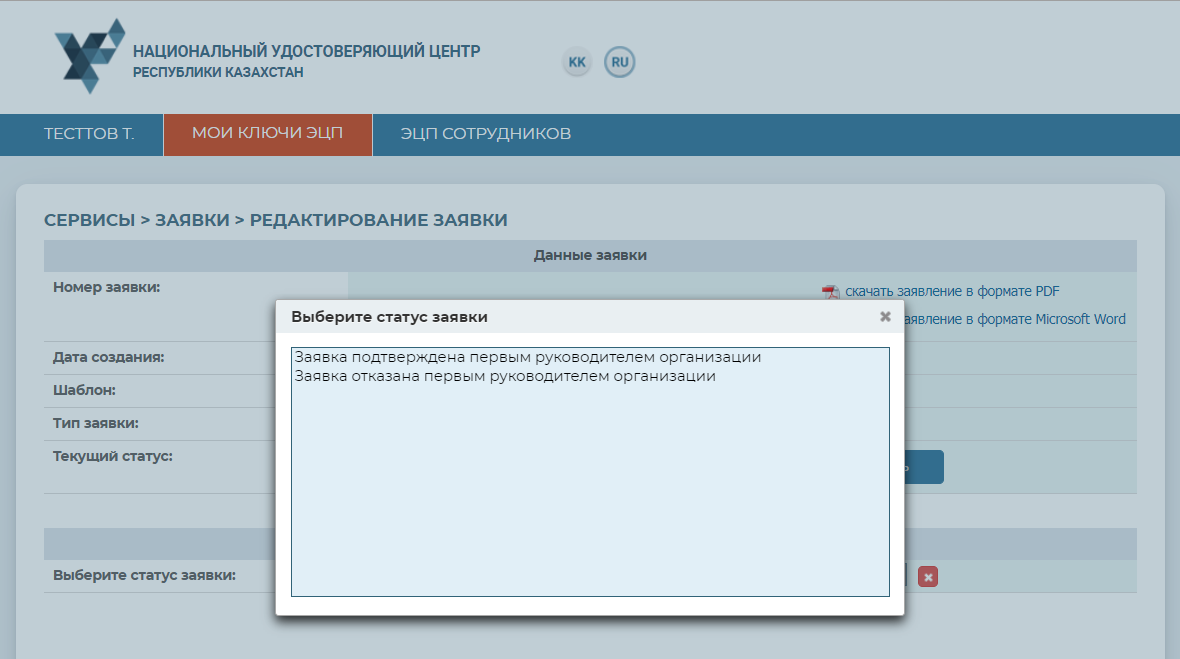
Upon selecting the application status, you should tick the box confirming the correctness of the data provided in the application and then indicate location of the certificate to be signed and enter the password.
After the change of status, the application looks like this:
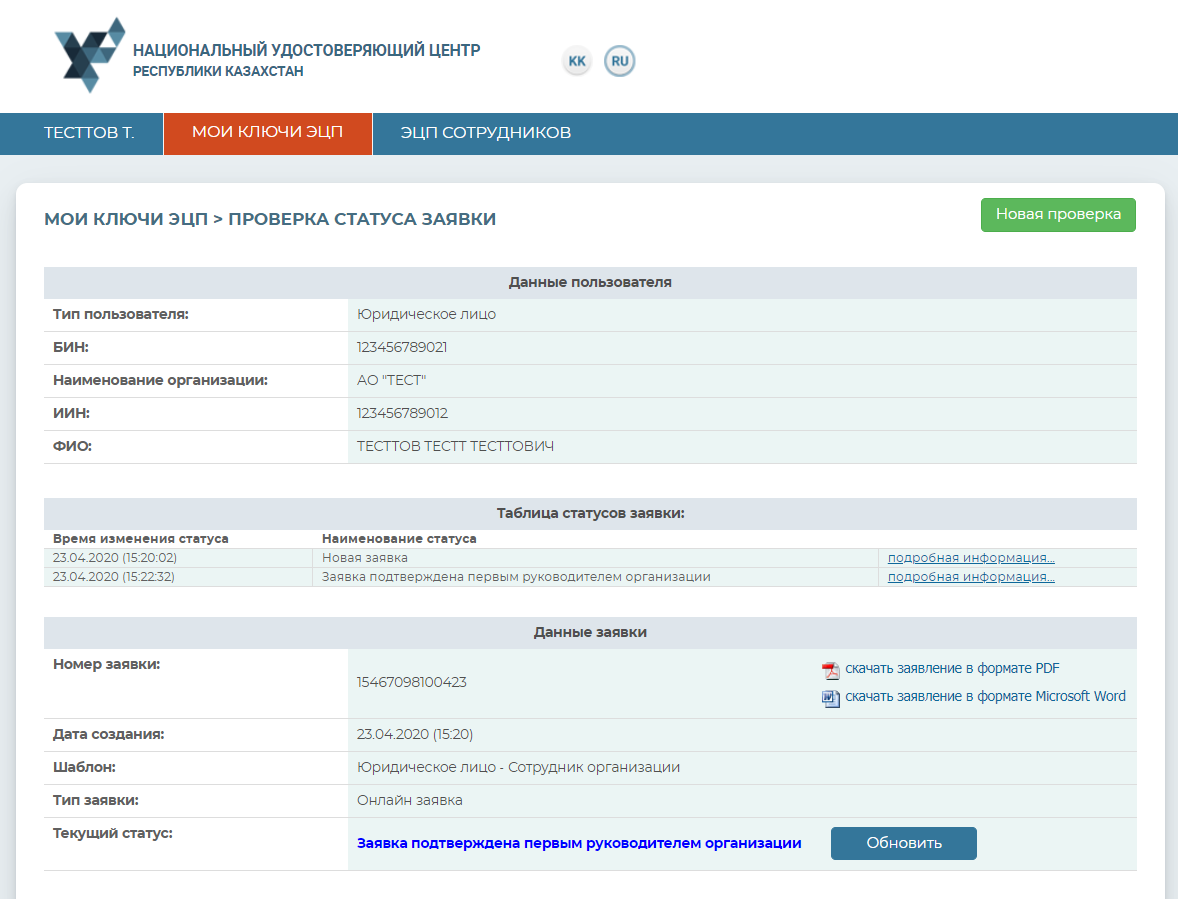
The certificate issue confirmation/rejection procedure has been completed.
List of digital signature keys
In the “List of digital signature keys” subsection, a signing-authority staff or an HR department staff endowed with the relevant rights by top executive is provided the capability of searching for the entity staffs’ certificates and revoking them.
To revoke the company staffs’ certificates, you need to search for certificates and then press the “Edit” button.

On the next page, you need to make sure the application to be revoked is correct, and specify the reason in the “Reason for Revocation” field.
Upon selecting the application status, you need to tick the box confirming the correctness of the data provided in the application, indicate the location of the certificate to be signed and then enter the password.
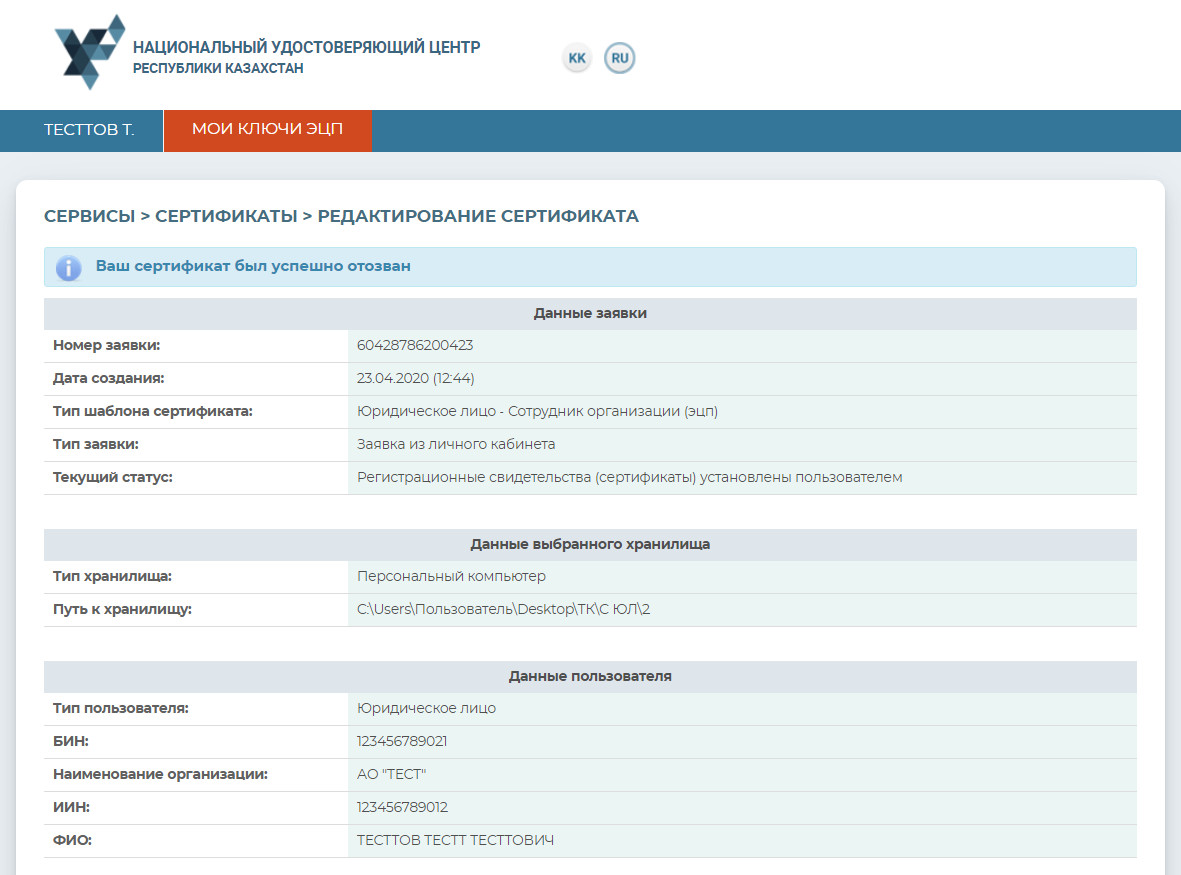
After the successful revocation, the application looks like this:
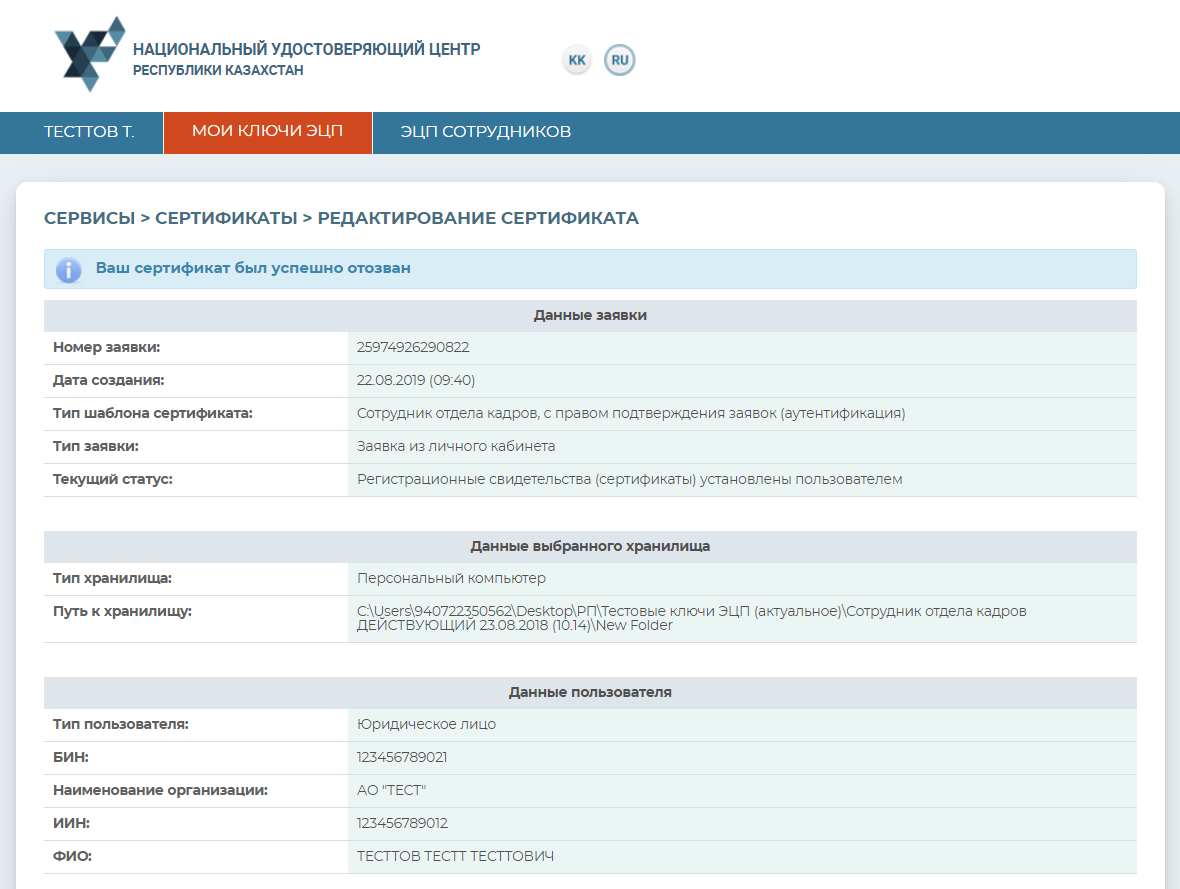
The certificate revocation has been completed.
Should any problems occur in your receiving the certificate, please do not hesitate to call technical support 1414, or write an email to: support@pki.gov.kz